Friday, September 30, 2011

Halloween Skills

I set up this activity for my son....not knowing if he would accept it.  He did....and he LOVED it!  This activity is multifaceted in that it is good for fine motor skills, recognition, sorting, problem solving, etc.  I bought the small glass jars from Michaels (in the wedding section) and the Halloween gems are also from Michaels.  I used sticky tacky  (you can get this at Walmart, Michaels, etc) to attach the items to the jars.  I left the lids on to encourage motor skills (he had to unscrew the tops - easy for him), and I intentionally put extra gems out so he would have to do some critical thinking and problem solving.  When he filled the jars up too full and the lids would not fit, he had to problem solve - and he did!


 THE INVITATION


 a closer look


 sorting BATS


 unscrewing the lid


 sorting purple gems


 putting lid back on


 sorting orange gems


VARIATIONS TO THIS ACTIVITY 
(sooooo many things you can do!)


 LETTERS.....or......CHILD'S NAME!!  (and no, this is not my son's name)
(letter jewels)


- AK (MESE, MECD)
You have read this article Playing with Light / Seasonal with the title September 2011. You can bookmark this page URL http://happychild2210.blogspot.com/2011/09/halloween-skills.html. Thanks!
Sunday, September 25, 2011

Glow Dough

You can see our playdough recipe here...  Playdough  

Paint to dye the dough is from here.... Paint

Neon paint can also be found at Michaels Craft Store.  However, it is more expensive.  

You can either mix the paint in before you cook it or add it to the dough after.  I added it to the dough after.  Next time I will definitely add it to the mixture before cooking.  

I had some alone time with my 19M old these past few days.  I set this up for her.  She is in love with dough so I thought we would add a new element.  :-) 

This will work under the use of a black light.  

RL


Added in some neon straws from Walmart.   :-)  


Here are some of our other favorite glow activities.


You have read this article Adventures in the Dark / Play Dough / Rainy Day Play with the title September 2011. You can bookmark this page URL http://happychild2210.blogspot.com/2011/09/glow-dough.html. Thanks!
Saturday, September 24, 2011

Power Tool to Pumpkin

This is not our first and will not be our last pumpkin before Halloween, Im sure!  It seems the theme in our house today was tools.  In this case - a power tool!  We got a little creative with a pumpkin and my 2.75 year old son loved it.

 I used a Sharpie to mark where I wanted him to drill.


 Finished product


You have read this article Clay and Crafts / Seasonal with the title September 2011. You can bookmark this page URL http://happychild2210.blogspot.com/2011/09/power-tool-to-pumpkin.html. Thanks!

Hammering for All Ages

It has been so interesting watching my son and RLs daughter fall into their "gender roles" as they have grown - and through no coaxing from us.  In true boy form, my son loves tools - all tools.  I KNEW he would love this activity.  I wanted everyone to see how this can be done with all ages, so we started with play doh, and progressed from there.  

ENJOY!

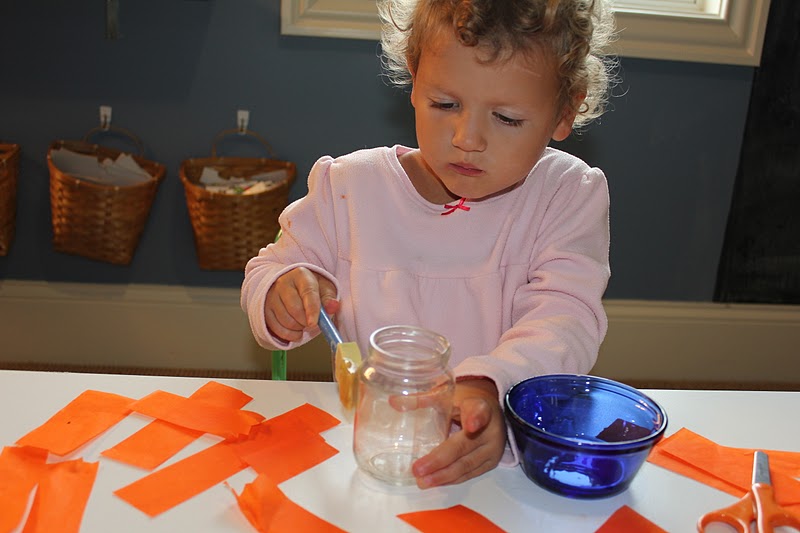
FOR THE LITTLE ONES.....


hammering the match sticks into the play doh

FOR THE TODDLERS..... 
(or SOME toddlers)

 nails


styrofoam block (Walmart)


 The Invitation (I left the plastic on the styrofoam in order to contain a potential mess)


 fine motor


We did this for over an hour!  He hammered the entire pack of nails into the block.  LOL


FOR THE OLDER CHILDREN......

 Numbers (and for those of you who are familiar - touchmath, which I love).  I used large Sharpie markers to write the numbers and touch points.  It takes a minute to dry.


 Adding nails to the touch points.  I had NO intention for my son to do this (I set it up just to show everyone a more academic take on this activity).  I actually thought he would leave once I wrote the numbers - LOL.  He was really interested, though, and wanted to do it - so I went with it. 


 He would hammer in the nail and I would count as he hammered each nail.  Then he would count the nails and say the name of the number.  Im not typically "academic" like this with him, but he was really into it.  Trust me, if it had been letters, he would have run for the hills!  LOL


 working on #5


 After numbers 1-5, he ASKED me to write #6.  Then, when it was all said it done, he drew a treasure map and hammered nails into the X.


You have read this article Clay and Crafts / Rainy Day Play with the title September 2011. You can bookmark this page URL http://happychild2210.blogspot.com/2011/09/hammering-for-all-ages.html. Thanks!

Satay Chicken

THIS IS SOOOOOO GOOD!  So good that my husband and my two year old want me to make it again tomorrow night!  I got this recipe from Deceptively Delicious.  Its so easy to make and if you prep before dinner, it only takes about 15 minutes (maybe even less) to make.

SAUCE
  • 2 cloves garlic
  • 1/4 C coconut milk
  • 1/4 C sweet potato puree (for lazy people like me, they sell organic sweet potato puree in a can)
  • 3 Tbs creamy peanut butter (I used Almond Butter)
  • 2 Tbs reduced sodium soy sauce
  • 2 Tbs of fresh lime juice (about 1 large lime)
CHICKEN SKEWERS
  •   boneless, skinless chicken breasts (I used 3 and it was NOT enough - we all wanted more)
  • wooden skewers
  • 1/2 tsp salt
  • 1/2 tsp garlic powder
  • 1/4 tsp pepper
  • 1/4 tsp paprika
  • 2 Tbs olive oil
Put all ingredient for the sauce in a blender or food processor and process until smooth.  Set aside.

Cut chicken into strips and coat with salt, garlic powder, pepper, paprika, and olive oil.  Thread chicken onto skewers.  Cook 7-9 minutes per side in a large skillet.  Serve with sauce immediately.  [I used a grill to cook my chicken on.  This model is discontinued, but you get the idea.]

YUM!!

- AK (MESE, MECD)
You have read this article Food Recipes with the title September 2011. You can bookmark this page URL http://happychild2210.blogspot.com/2011/09/satay-chicken.html. Thanks!
Thursday, September 22, 2011

HALLOWEEN CANDLES

I saw this done in this month's issue of Women's Day Magazine.

Materials:

Empty glass jars
Scissors
Orange tissue paper
Decoupage glue
Black construction paper

Measure strips of tissue paper and cut to fit the size of jar.  Brush glue on a small section and adhere tissue paper.  The article said to dilute the glue to 3 parts glue, 1 part water.  We just winged it.  We overlapped a little bit.  Cover the outside of the jar and let dry.  Cut out shapes in black construction paper and glue onto the jar.  Apply glue to entire jar to seal and let dry over night.  Article said to place battery operated votive candles in but we just used real tea lights.  


All ready


Cutting her paper


My 19M old could care less about this one. 


Applying glue


Still working away on her playdough.  LOL  


Oldest takes a break to play, too.  


Back to the candles


Picking glue off the fingers was fun, too!  


Cutting off the excess.  She is very meticulous!  


I did the big one... oldest did the little one


I loved the way these came out, I ended up making a bunch and putting them on our mantle...  all with stuff we had on hand at the house.  Take that pottery barn!  :-)  My daughter's candle is on the far left.  She decided to use orange construction paper for her design so it didn't show up so well... and that is OK!  :-)  


RL  


You have read this article Clay and Crafts / Seasonal with the title September 2011. You can bookmark this page URL http://happychild2210.blogspot.com/2011/09/halloween-candles.html. Thanks!