So, maybe I need to invest in some new cookie cutter shapes because all we have are Christmas shapes and whenever we use them with Play Doh, Christmas is in the air (which really isn't all that bad if you ask me). Anyway, the other day my son wanted to use Daddy's heat gun, so we were exploring it together and using it to melt Easter grass - fun. We made a "birds nest" with that. Last night before bed we were playing with play doh and the cookie cutters and my son asked if we could make ornaments. It was near bed time so I assured him we could do it tomorrow (today). My mind immediately went to THIS post that I saw the other day by The Artful Parent. I'll have to say that her way (in the oven) is probably easier, but my son wanted to play with the heat gun again, and it only took us a few minutes per ornament.
What we used:
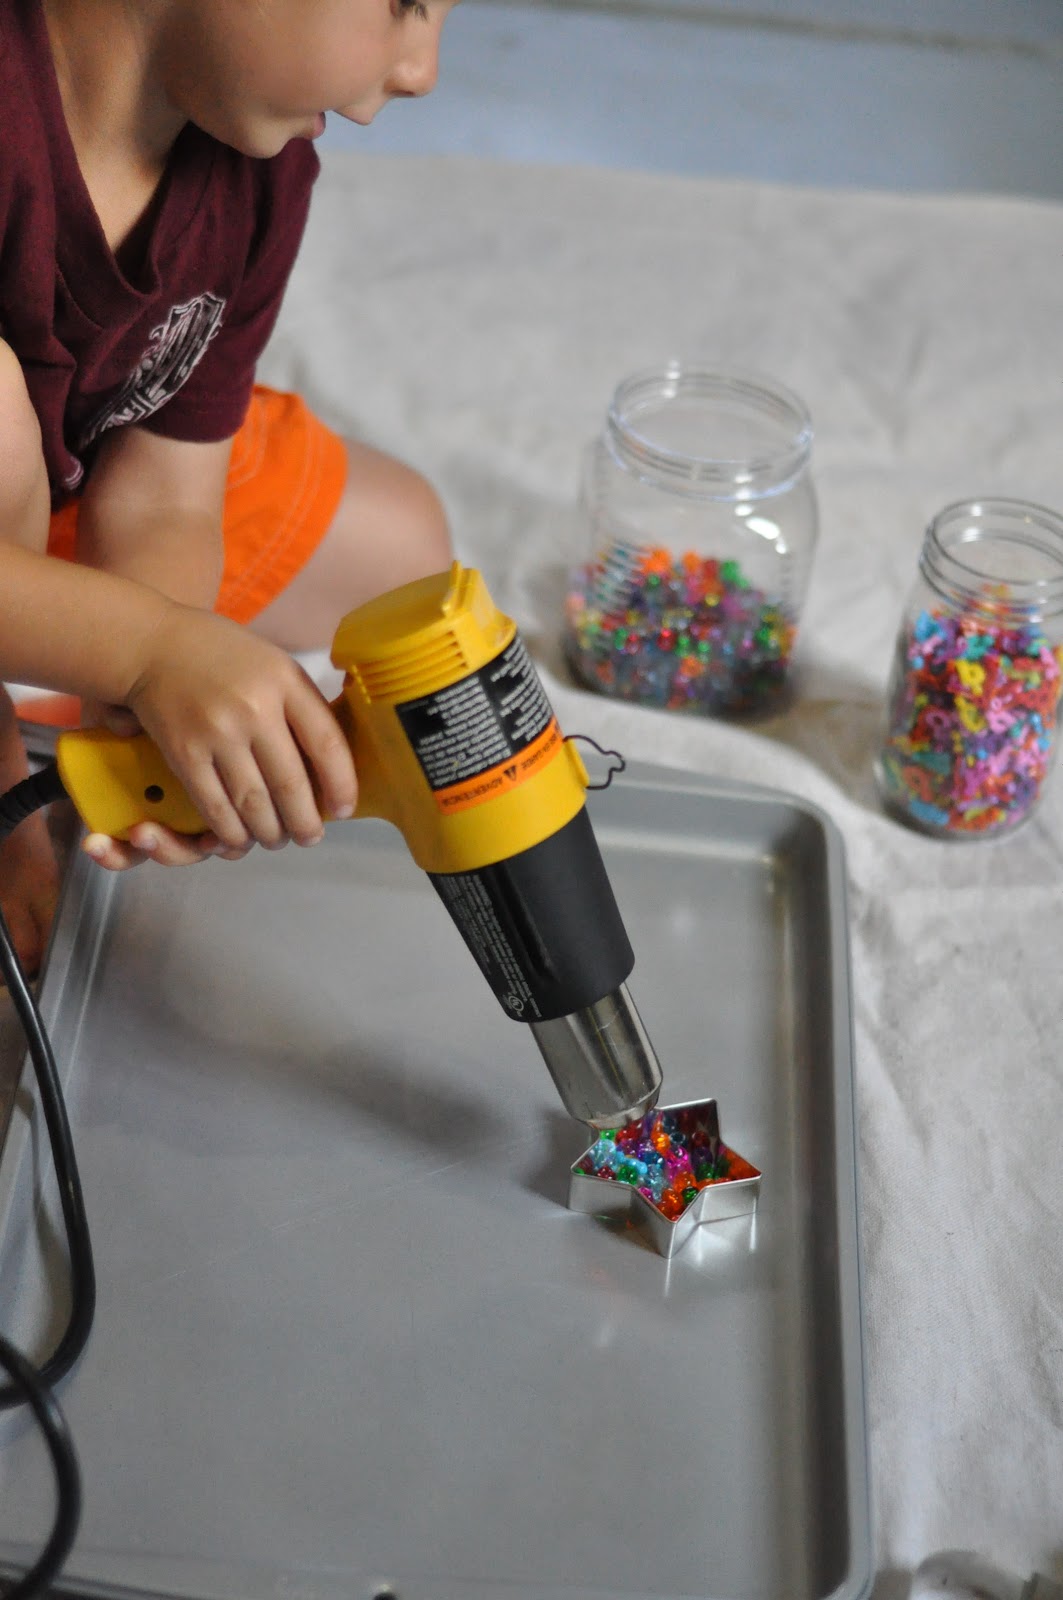
- heat gun
- metal cookie cutters
- cookie sheet
- pony beads
- alphabet beads
TIP:
**Do this in a ventilated area as the fumes from the melting plastic are pretty strong!**
We did it in the garage, with the door open and a fan blowing on us.
Basically you just put beads in the cutters, heat/melt, wait until cool, and pop them out.
 |
| The invitation |
 |
| Filling the star shape with pony beads |
 |
| melting |
 |
| There are some points missing because we didn't use enough beads, but this was HIS work, not mine, and I didn't want to interfere in the process. I think its pretty cool! |
 |
| "Cool colors, Mommy!" |
 |
| The orange one is his "cat", then there is a snowflake and a star. He decided he wanted to use them to make necklaces (no idea where THAT idea came from). We plan to put yarn on them later. |
We totally plan to do this again in December. :)
- AK (MESE, MECD)
You have read this article Clay and Crafts /
Do It Yourself /
Seasonal
with the title Heat Gun Ornaments. You can bookmark this page URL http://happychild2210.blogspot.com/2012/07/heat-gun-ornaments.html. Thanks!


No comment for "Heat Gun Ornaments"
Post a Comment