Tuesday, July 31, 2012

Baked Cotton Balls

My 29M old loves putting stickers and stamps all over her body.  Well, a couple months ago she put one of those green Starbucks stickers on her leg.  I could NOT get it off.  I swear those things are the stickiest stickers on the face of the planet.  So... I did a google search on how to take a sticker off of skin (LOL)... I love the internet!  It brought me to the ehow page on how to use a cotton ball and alcohol (this did not work just FYI... we ended up using olive oil).  While on the ehow webpage THIS was under my "You may also like".  Of course we had to try it.  :-)  

Materials:

2 cups flour
2 cups water
Food coloring/Liquid watercolors
Cotton Balls
Baking pan/sheet
Cooking Spray

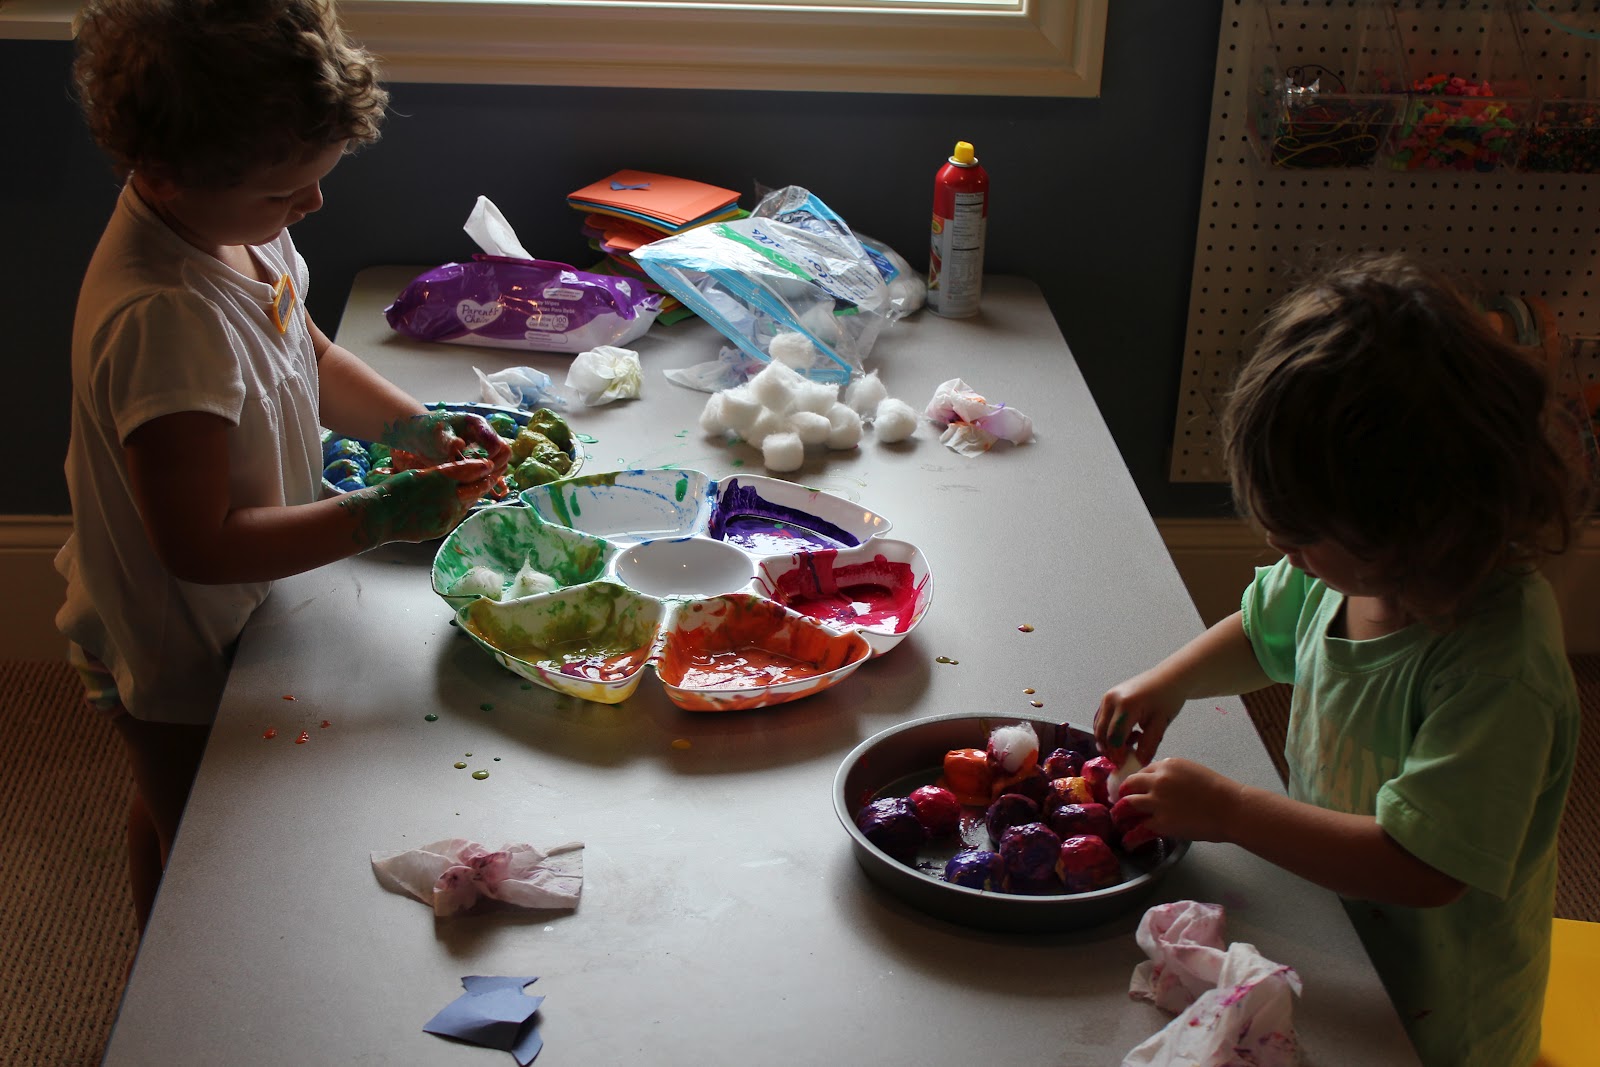
Mix flour with water.  We found 2 cups of water and 2 cups of flour was a perfect amount to give you 6 colors.  You can use more or less.  This was enough for my 2 older girls.  Spray a baking sheet with cooking spray.  Dip your cotton balls into the mixture and make your design.  Bake at 300 degrees for 45min to 1 hour.   If you place the cotton balls next to each other they will stick together while baking.  I told the girls to cover their cotton balls completely with the mixture.  I'm not so sure how dry cotton would do in an oven!    


The invitation.  


My oldest starting on her design.  We used a round cake pan for these.  


She liked cleaning her hands with the cotton balls.  


My 29M old was trying very hard not to get dirty.  LOL  


They used one color up at a time to the very last drop.  


"This feels so slimy"


"I'm making an apple pie.  What are you making?


There were a few cotton balls that my 29M didn't quite cover completely.  I did double dip them for her.  


My 29M old's "turtle".  


My 3.5 year old's "Apple pie".  


Post baking.


Post baking.  My oldest thinks these taste fantastic!  LOL  

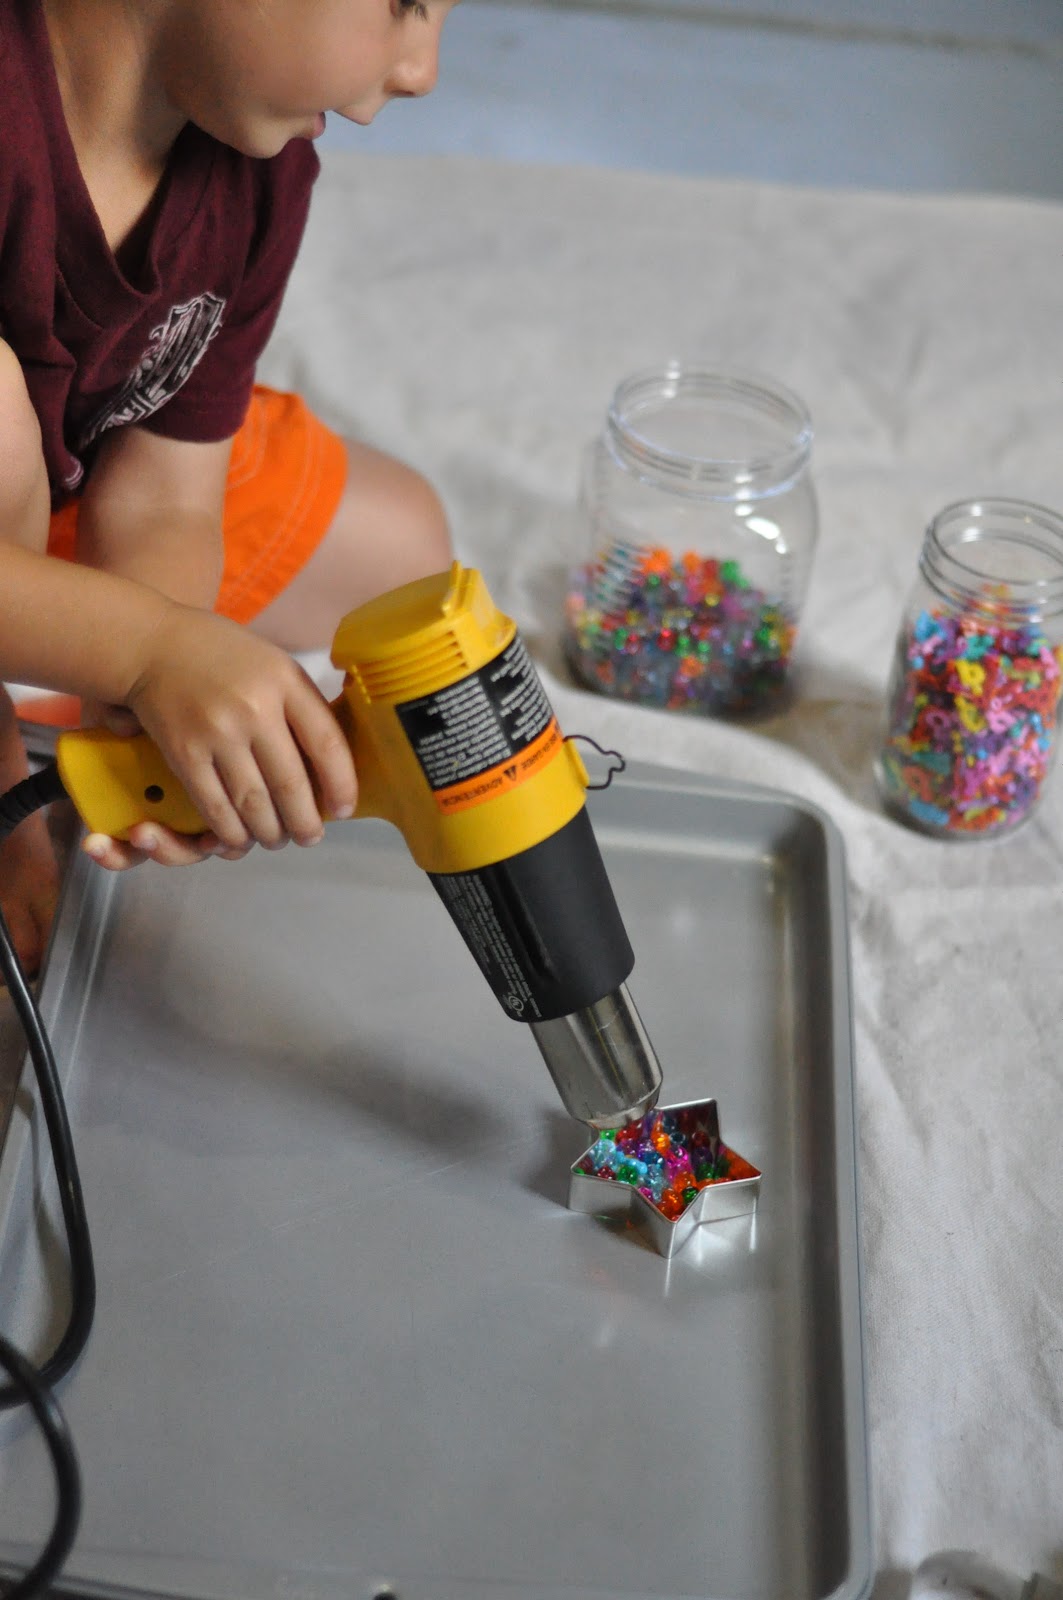
They do get pretty hard, however, you can still break them open and pull out the cotton from inside.  Pretty cool.  The possibilities for these are endless.  You can do designs, patterns, letters, numbers, animals, etc.  You can also draw on them after they are cooked.  It's pretty much a cotton ball paper mache.  

RL  


You have read this article Clay and Crafts / Rainy Day Play with the title July 2012. You can bookmark this page URL http://happychild2210.blogspot.com/2012/07/baked-cotton-balls.html. Thanks!
Monday, July 30, 2012

Peek-A-Boo Box

I made A CAVE OF STARS a few days ago for my youngest (8 months).  We've been having so much fun with this box since.  We started a little game of peek-a-boo with me closing and opening the door on her.  She loved loved loved this.  So..... it led me to this....

The Peek-A-Boo Box


All you need is a big box and something to cut the little doors.  I just used a kitchen knife.  This is one side of the box.  These doors are all over the box in different sizes.  


My older girls loved this as well!  Here she is with my 29M old playing.  I found it to be a great way for them to really play and interact with her.  :-) 


Smart baby!  :-P  


It was hard to capture pictures of this since my camera had to be at a certain angle to shoot through the hole.  Here she is anticipating what hole we will surprise her in next.  


We also used animals as well as instruments to make different sounds. 

"There is the cow!  You're touching his nose.  That must feel soft and fuzzy."  


She loved the holes closer to the ground she could peer out herself.

RL 

You have read this article Cardboard Boxes / Rainy Day Play / Things to do with infants with the title July 2012. You can bookmark this page URL http://happychild2210.blogspot.com/2012/07/peek-boo-box.html. Thanks!
Sunday, July 29, 2012

Edible Stained Glass

The other day on THIS post a "fan" said something along the lines "that it would be cool if the candy melted to make edible stained glass".  YES- that would be cool.  :-)  So we tried it.  We melted the gummies we used that day and had ONE BIG GOOEY MESS!!  That was fun.... NOT.  
When we were kids we used to make homemade lollipops.  I knew there would be a recipe out there where you could make your own.  After searching I came across THIS Very cool... but I wanted something that would be a little bit more hands on for the girls.  With a little more searching I learned you can melt hard candy down and have it reform.... Uh duh!!  Why didn't I think of that the first time around.  :-P  So here is our Round 2 go at it....


I bought 2 different kinds of hard candy.  Jolly Ranchers and Life Savers.  I knew the Life Savers would crush easily if we wanted to break pieces up.  

My 29M old was apart of this whole process.  Setting up the invitation was actually her favorite part!  So much fun learning going on as well.  :-)  Color recognition... sorting.... fine motor...


Taking the wrappers off. 


My 29M old was all over the crushing part. 


Again, true to form... my oldest (3.5) hard at work making her masterpieces.  We placed the pieces inside of cookie cutters and also canning lids (what I had on hand).  We also did a few free form.... these were my favorite!  


"I crushed it all up, Mommy!!!"  


Filling in the circles.  


This was as far as my 29M old got....


Design and Drill was much more appealing. 


My oldest's pre-oven.  She decided to do one more free from because "we needed to have 3 for each of them."  We baked these at 325 for about 5-6 minutes.  


Waiting.....


Finished!  


I placed the cookie sheet on top of a towel.  Before they harden you can use a toothpick to make swirls in your designs (we did this as kids... so much fun!).  


You can also make a hole to hang them.  You have to pop them out of the cookie cutters, etc before they harder all the way, while they are still warm or they will crack.  Oh... we also sprayed the parchment paper with cooking spray.  Next time we will spray the cookie cutters as well.  


After we saw how cool the free form ones came out my oldest asked to make more.  She asked if we could make a flower.  We did this one together.  


Heart


We made a couple lollipops as well.  Just place a stick in your design while it is still warm.  


Canning lid with toothpick swirls.  


Our flower turned into "it looks like a cloud... that's a pretty cool cloud."

"It feels so warm and cozy."  


She chose to hang this one up.  

Materials:

Cookie cutters/canning lids (or do them free form)
Hard candies
Parchment paper
Cooking spray
Cookie sheet

Place parchment paper on your cookie sheet and spray with cooking spray.  Place candies within the cookie cutters or make designs free form.  Pop in the oven at 325 for 5-6 minutes.  Let cool a little bit.  You an also make designs during this time or put holes in them to hang.  Pop them out while they are still warm to the touch.  Let harden.  

RL  

You have read this article Clay and Crafts / Cooking / Edible Activities / Rainy Day Play with the title July 2012. You can bookmark this page URL http://happychild2210.blogspot.com/2012/07/edible-stained-glass.html. Thanks!
Saturday, July 28, 2012

Freebie

We always love when "fans" expand on what we put out there.  We received an email the other day from Ashley Buterbaugh with a picture of something similar to the one below.  She used our template from our Circle Sheets and created a fun letter search type game.  We asked her if we create one of our own and offer it to all of you for free.  Obviously, the answer was YES!  Click on the links below to download.  
You will receive an email from ejunkie for an instant download.  

To purchase our complete packet of Letter/Number Templates click HERE


To utilize this sheet you can buy the primary color circle stickers and letter stickers available at Target and online.  The letter stickers shown below are from Target for 1.00


This is Ashley's original picture she sent to us.  


This is the document you will receive for free.


Add to Cart

View Cart


You have read this article Documents with the title July 2012. You can bookmark this page URL http://happychild2210.blogspot.com/2012/07/freebie.html. Thanks!

Heat Gun Ornaments

So, maybe I need to invest in some new cookie cutter shapes because all we have are Christmas shapes and whenever we use them with Play Doh, Christmas is in the air (which really isn't all that bad if you ask me).  Anyway, the other day my son wanted to use Daddy's heat gun, so we were exploring it together and using it to melt Easter grass - fun.  We made a "birds nest" with that.  Last night before bed we were playing with play doh and the cookie cutters and my son asked if we could make ornaments.  It was near bed time so I assured him we could do it tomorrow (today).  My mind immediately went to THIS post that I saw the other day by The Artful Parent.  I'll have to say that her way (in the oven) is probably easier, but my son wanted to play with the heat gun again, and it only took us a few minutes per ornament.  

What we used:

  • heat gun
  • metal cookie cutters
  • cookie sheet
  • pony beads
  • alphabet beads

TIP:

**Do this in a ventilated area as the fumes from the melting plastic are pretty strong!**
We did it in the garage, with the door open and a fan blowing on us.

Basically you just put beads in the cutters, heat/melt, wait until cool, and pop them out.

The invitation

Filling the star shape with pony beads


melting

There are some points missing because we didn't use enough beads, but this was HIS work, not mine, and I didn't want to interfere in the process.  I think its pretty cool!

"Cool colors, Mommy!"

The orange one is his "cat", then there is a snowflake and a star.  He decided he wanted to use them to make necklaces (no idea where THAT idea came from).  We plan to put yarn on them later.

We totally plan to do this again in December.  :)

- AK (MESE, MECD)
You have read this article Clay and Crafts / Do It Yourself / Seasonal with the title July 2012. You can bookmark this page URL http://happychild2210.blogspot.com/2012/07/heat-gun-ornaments.html. Thanks!
Friday, July 27, 2012

Painting With a Hot Glue Gun (when invitations are a BUST!)

Invitation to "paint" using a hot glue gun and crayons


I would like to preface this post by recommending that you NOT try this.  Unless there is some secret I don't know about that will get it to work - it doesn't. 


From an adult perspective, it’s a real bummer when invitations are a bust.  Sometimes it’s a real bummer for the child, too. If we are mindful, though, and take some time to think about it - there are some really great things that can come from an activity FAIL.

The Process – For this particular activity, my son was a participant in the set up.  He chose the COLORS (recognition) and HOW MANY (counting) crayons he wanted to use.  PEELING (fine motor skills/patience) the paper off of the crayons was another fun step that he enjoyed.  Once the glue gun was hot, he MANIPULATED (fine/gross motor skills) the crayon into the glue gun, which took some pushing!

Problem Solving – We realized quickly that this was going to be tricky.  How do we get the crayon in?  Do we need to wait in between squirts for the crayon to melt?  What happens when the crayons break?  What if we push the crayon instead of relying on the trigger?  How does this glue gun work anyway? 

Our crayons were breaking, the glue gun only worked a few times with the trigger, at one point it squirt across the room onto the wall, etc.  **Sigh**
It seemed to come out easier when we pushed the crayon, but that’s pretty tricky for little toddler hands.  WOW – this stinks.

Teaching Emotional Intelligence - As an adult who has all the tools I need to self-regulate, I’d say I handled it pretty well.  My son was frustrated, though, and curled up in a ball with his head down on the carpet.  He’s really quite good at self-regulating, but for many toddlers – something like this could cause an onslaught of developmentally appropriate emotions (AKA - a tantrum).  We can see this as an annoyance or an opportunity.  What a wonderful opportunity to “teach” emotional intelligence.  An opportunity to validate our children’s emotions, empathize with their feelings, and model compassion as we remain fully present and supportive through those emotions.

So you see - even when we put in all of that effort to set up invitations for our children – and they are a bust – it’s never for “nothing”.   The reality is that everything is an opportunity to teach/learn and connect with our children.


- AK (MESE, MECD)
You have read this article Clay and Crafts / EMOTIONAL INTELLIGENCE THROUGH PLAY with the title July 2012. You can bookmark this page URL http://happychild2210.blogspot.com/2012/07/painting-with-hot-glue-gun-when.html. Thanks!

Edible Art Frames

The other day my oldest was "cleaning out the car".  She found a candy cane and got all excited.  Yes - we still had a candy cane in the console from Christmas.   LOL  (AK... slow down your breathing).  Every year at Christmas we make Candy Cane Bark.  She asked me if we could make it.  Of course the answer was yes... we just went a different route.  :-)  


The Invitation.

Cookie Sheet
Wax Paper
Various candies and sprinkles.
Pretzels put together to make a frame.
White Ghirardelli Chocolate Chips

You can use whatever chocolate you want.  I know Baker's makes baking chips.  I just LOVE Ghirardelli chocolate.  

You also don't have to use candy.  You can pretty much put in whatever you want.  Some other suggestions:

Crushed nuts
Dried fruit
Pretzels
Sprinkles
Marshmallows
Crumbled cookies
Graham Crackers
Raisins
Coconut
Popcorn


AK and her son stopped by.  :-)  


Whoa!!!  LOL  


As you can clearly see my 29M old and AK's son could care less about the art part of this. 


Look it's a flag


A couple of the girls friends stopped over so I set this up for all of them.  I originally bought 2 bags of chips... one for each of my older girls.  This one was just half a bag.  It was a little too thin so it cracked.  


My oldest way playing with her friend on the first round of these and came down to the invitation after they left.  We did this with one whole bag of chips.  

To melt the chips just pour the bag into a microwave safe dish and microwave.  Ours took around 3 minutes... stopping to stir after each minute.  

After melting, spread it out on the wax paper in the shape of a square.  Add your pretzels around the outside to make a frame.  


Decorating her frame.  (3.5 years)

My oldest had no desire to eat the candy during this process.  She was more interested in the art... totally true to form for her.  


She loved this.  :-)  


Finished!  Ours took about 20 minutes to cool and set.  

I used a spatula to pick it up off the cookie sheet and then peeled off the wax paper.

It was sturdy enough to handle!  


Proud girl/  


"Can I eat some?"


Enjoying some of her masterpiece.  

You could do this on a smaller scale as well. 

It would be cute with smaller pretzel rods, pop in a ziploc, and give away as gifts.  :-) 

RL 
You have read this article Clay and Crafts / Cooking / Edible Activities / Rainy Day Play with the title July 2012. You can bookmark this page URL http://happychild2210.blogspot.com/2012/07/edible-art-frames.html. Thanks!